
Hoodies are a staple part of my wardrobe. I rarely actually use the hood, but for some reason I just really like them. When I saw these black and white polka dot and white and black + ladybug polka dot fabrics, I was overcome with the need to turn combine them into something great. And what’s better than a hoodie? A reversible hoodie.
(I run a little fabric store and sewing studio in Waterloo, Canada, so I got both fabrics there – the Stenzo ladybugs and the Robert Kaufman Laguna polka dots – but any cotton spandex knit would work well for this hack!)
I made my first Concord t-shirt a few months ago and thought it was great. It fit well and it was comfy, just like a t-shirt should be. I thought that it would be nice to have a hoodie that fit as well as the Concord did. That’s when I set out to turn that humble (but great) t-shirt pattern into a super awesome reversible hoodie. I’m pretty happy with the outcome. I’ve outlined the steps that I followed below in case you want to make your very own.
How to make the most awesomest hoodie, that all your friends will want to steal:
REQUIREMENTS:
- Concord T-Shirt pattern or another pattern that makes you happy. I think this idea should work with most t-shirt patterns.
- Enough fabric to create 2 long sleeve shirts + a bit more for the hood and pockets. I used 2 metres (about 2.2 yards) of each fabric to make my shirt (sized between sizes 16-22).
- Reversible separating zipper the length of the front. I couldn’t find a reversible zipper, but got a normal zipper and a reversible zipper pull that I used to replace the original.
PATTERN ADJUSTMENTS:
I used the same size as I would use for making a t-shirt. I’ve graded the pattern between 3 different sizes to get my desired fit already.
Front: Start with the high neckline piece. I added 1.5 inches to the center front seam to allow space for zipper and to give a little extra room for layering. I also raised the center neckline about 0.5 inches, evening out the curve. Cut to the length of the zipper plus seam allowances for top and bottom.

Back: Use the pattern piece as if you were making a t-shirt. Because the length of the front needs to be adjusted to the length of the zipper, you’ll need to adjust the length of the back as well. Make sure your side seams end up being the same length and you should be good.
Sleeves: Use the pattern piece as if you were making a long sleeve t-shirt. I made them with the same adjustments I usually use, but would consider making them a little bit wider to allow for layering over other long sleeve shirts.
Hood: Measure along the front and back neckline pieces. Create a hood shaped piece with this as the base length. I traced around a ready-to-wear hoodie hood to get the basic shape.

Pockets: Decide how tall you want your pockets to be. Trace the bottom of the front piece the size and shape of the desired pockets.

ASSEMBLY STEPS:
1. Cut out pattern pieces with adjustments.
2. Cut out the fabric pieces for two hoodies.
3. Sew the first shirt.
a. Create the pockets and attach to front pieces:
i) Press the top edge of the pocket down approximately 1/4 inch. (When I do this again, I’d probably fold this over twice to get a nicer finish on the inside of the pocket so that a raw edge doesn’t pop out. Or maybe even line the whole pocket with the opposite fabric for fun.)
ii) Top stitch along the curved edge of the pocket.
iii) Attach the pocket to the corresponding front by topstitching along the top edge and basting around the rest of the edges, except the curved part, that should stay open so you can put your hands in. If you do the basting stitches within your seam allowances, you don’t need to pick them out later.

b. Sew the shoulder seams.
c. Attach sleeves.
d. Attach hood. Align center back with the center back of the hood and front points. Stretch and ease as necessary, but the pieces should be pretty close to the same length.
e. Sew along side seams and sleeves.
f. You should have unfinished edges along the front, bottom, and sleeve cuffs.
4. Repeat for your second shirt.
5. Now the fun part, where 2 shirts become 1.
a. Put one shirt inside the other, right sides together.
b. Sew along the front edge of the hood starting at the neckline
c. Sew along the bottom edge of the shirt.
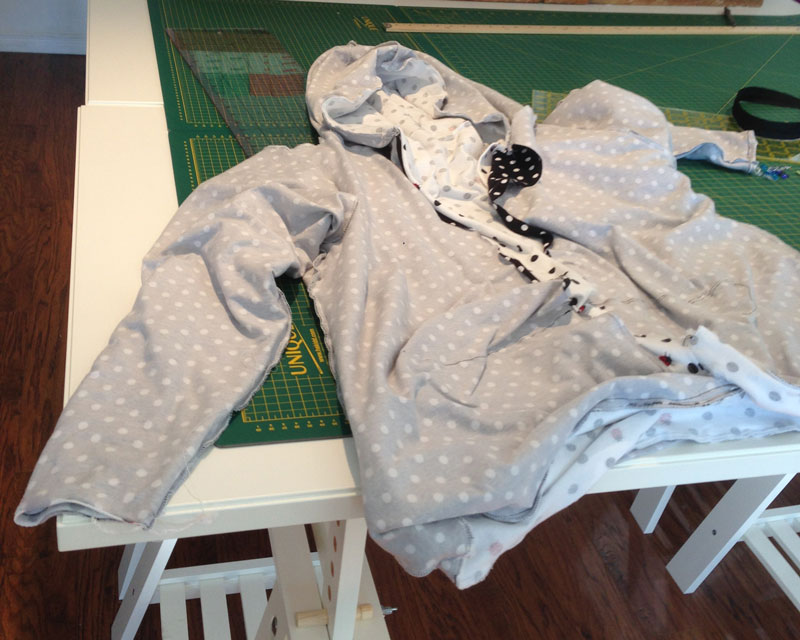
d. Turn the shirts right-side-out. Aligning the sleeves to make sure they aren’t twisted when put together.
e. Turn each of the cuff edges in towards their wrong-sides.
f. Reach between the two shirts through the front edge, down the sleeves, and grab the folded in cuff edges. Pull out of the shirt front holding the two sleeve edges right-sides together.
g. Ensure the seams are aligned. Pin around the edges of the cuff, raw edges aligned, right-sides together. Sew around the cuff.
h. Pull the sleeve back out so that it is like a sleeve.
i. Repeat e – h for the other sleeve.
j. Along the front edge, press the seam allowance in, toward the wrong sides.
k. Insert the zipper and hand baste it into place. You could use other methods to tack it into place, but you should do something to help keep the fabric and zipper aligned. I had to pick out my first attempt when I didn’t baste it into place. The front ended up 3 inches longer than the zipper and got all wavy. Definitely not awesome.
g. Sew in the zipper by top stitching along the edge of the zipper. The exact positioning of the stitch line is up to you, just make sure it is within your seam allowance. Be careful not to stretch the fabric as you sew in the zipper. You’ll probably have to lower the tension on your presser foot. I lowered mine as much as possible, and it still pulled on the fabric more than I wanted, creating a few puckers along the stitch line of my top shirt.
6. Admire your awesome reversible hoodie that you made yourself. 

Such a awso.e idea, one I’d love to try. The pocket idea really sold me. But I am a little confuse a little the sleeves. You said if I understand, you pulled the out to hem them. Could you not just fold over and sew them with out pulling them thru? Cause I’m thinking if right sides are 5ogether any thing you do would be on the inside where their sandwiched together. Please explain some more. I’m sorry but I am new at sewing garments. Lol.
Thanks! So for the sleeves, I thought the same thing initially, but if you sew them when it is all inside out, you won’t be able to turn it right side out. You’ll end up with both shirts right side out, but the sleeves will form a tube, so you won’t be able to get one back inside the other. I ended up trimming off the sleeve and doing it the way recommended above in the end. Does that make more sense? If you make your sleeves a little long you can give it a try yourself, sometimes you have to have that aha moment for yourself 🙂
Looks great! Beautiful job! Inspired thinking out of the box!
Love it, I’m doing thisone! Pinned to pinterest so it’s on the to do list. Thank you for this great tutorial
A kickin’ hoodie–gotta love it! Extra points for positive-negative fabric. Ignored a double-sided fleece sale yesterday Loved my ugly but warm fleece hoodie; time to make its replacement before the serious fall weather arrives. Kangaroo pockets, Here Ah Come!
Funny maybe it’s a Caroline thing! My 22 year old daughter is also named Caroline, and loves, loves, loves hoodies. I forsee a reversible hoodie project in my future. She also loves ladybugs. Thanks so much for sharing! Wonderful!!!!!
INNOVATIVE! Just in time for Fall layering & Love your fabric choices. So much more attractive than RTW. Thanks for the gift of your great idea!
Thank you! thank you! thank you! for this post and inspiration . I totally love hoodies because they are so practical and so comfortable but always look like, well, they look like hoodies. Your idea for making a stylish hoodie is perfect. Thanks for the inspiration and suggestions for the details. I CAN DO THIS!
Thank you for the wonderful tutorial. I wouldn’t have thought to make a hoodie out of a T-shirt pattern, but wow! This is great.
It’s the perfect thing to wear around the house this winter when its chilly.
I can imagine using this to make reversible hoodies for the minions in the house so I’m not listening to them complain about the house being cold.
Thanks for the tutorial! I need light jackets here in GA with my overheated body but no hoods for me! Love the reversible. So chic!
Oh, I really like this! And a great tutorial. Thank you for taking the time to write and shoot all the good photos. I will look for some fabric, but have to say I in love with the polka-dot-ladybug fabric.
WOW WOW WOW WOW!!!! I’m in awe! This is fantastic! I’ll bet Jenny will be tickled pink!
just brilliant.