Have you ever fallen in love with a pattern… and then realized there’s no shaping at all in the bust? I’m talking about popular patterns like the Grainline Scout Tee, the Sew Caroline Tank Dress or the Wiksten top. If you’re remotely busty – and you want the top to be remotely non-tent-like – then it would be easy to sigh a big sigh and move on. In addition, none of these patterns goes up to bigger sizes, so an FBA is also needed – yet more annoyance.
But there is a solution! It’s actually easy to do an FBA and add a dart to any of these patterns. Obviously it does change the original design, and the garment will be a little more fitted and a little less flowy. However for many of us, that’s a preferable look.
For this tutorial, I’m using the Sew Caroline tank dress as the basic pattern, but it works equally for any non-darted top
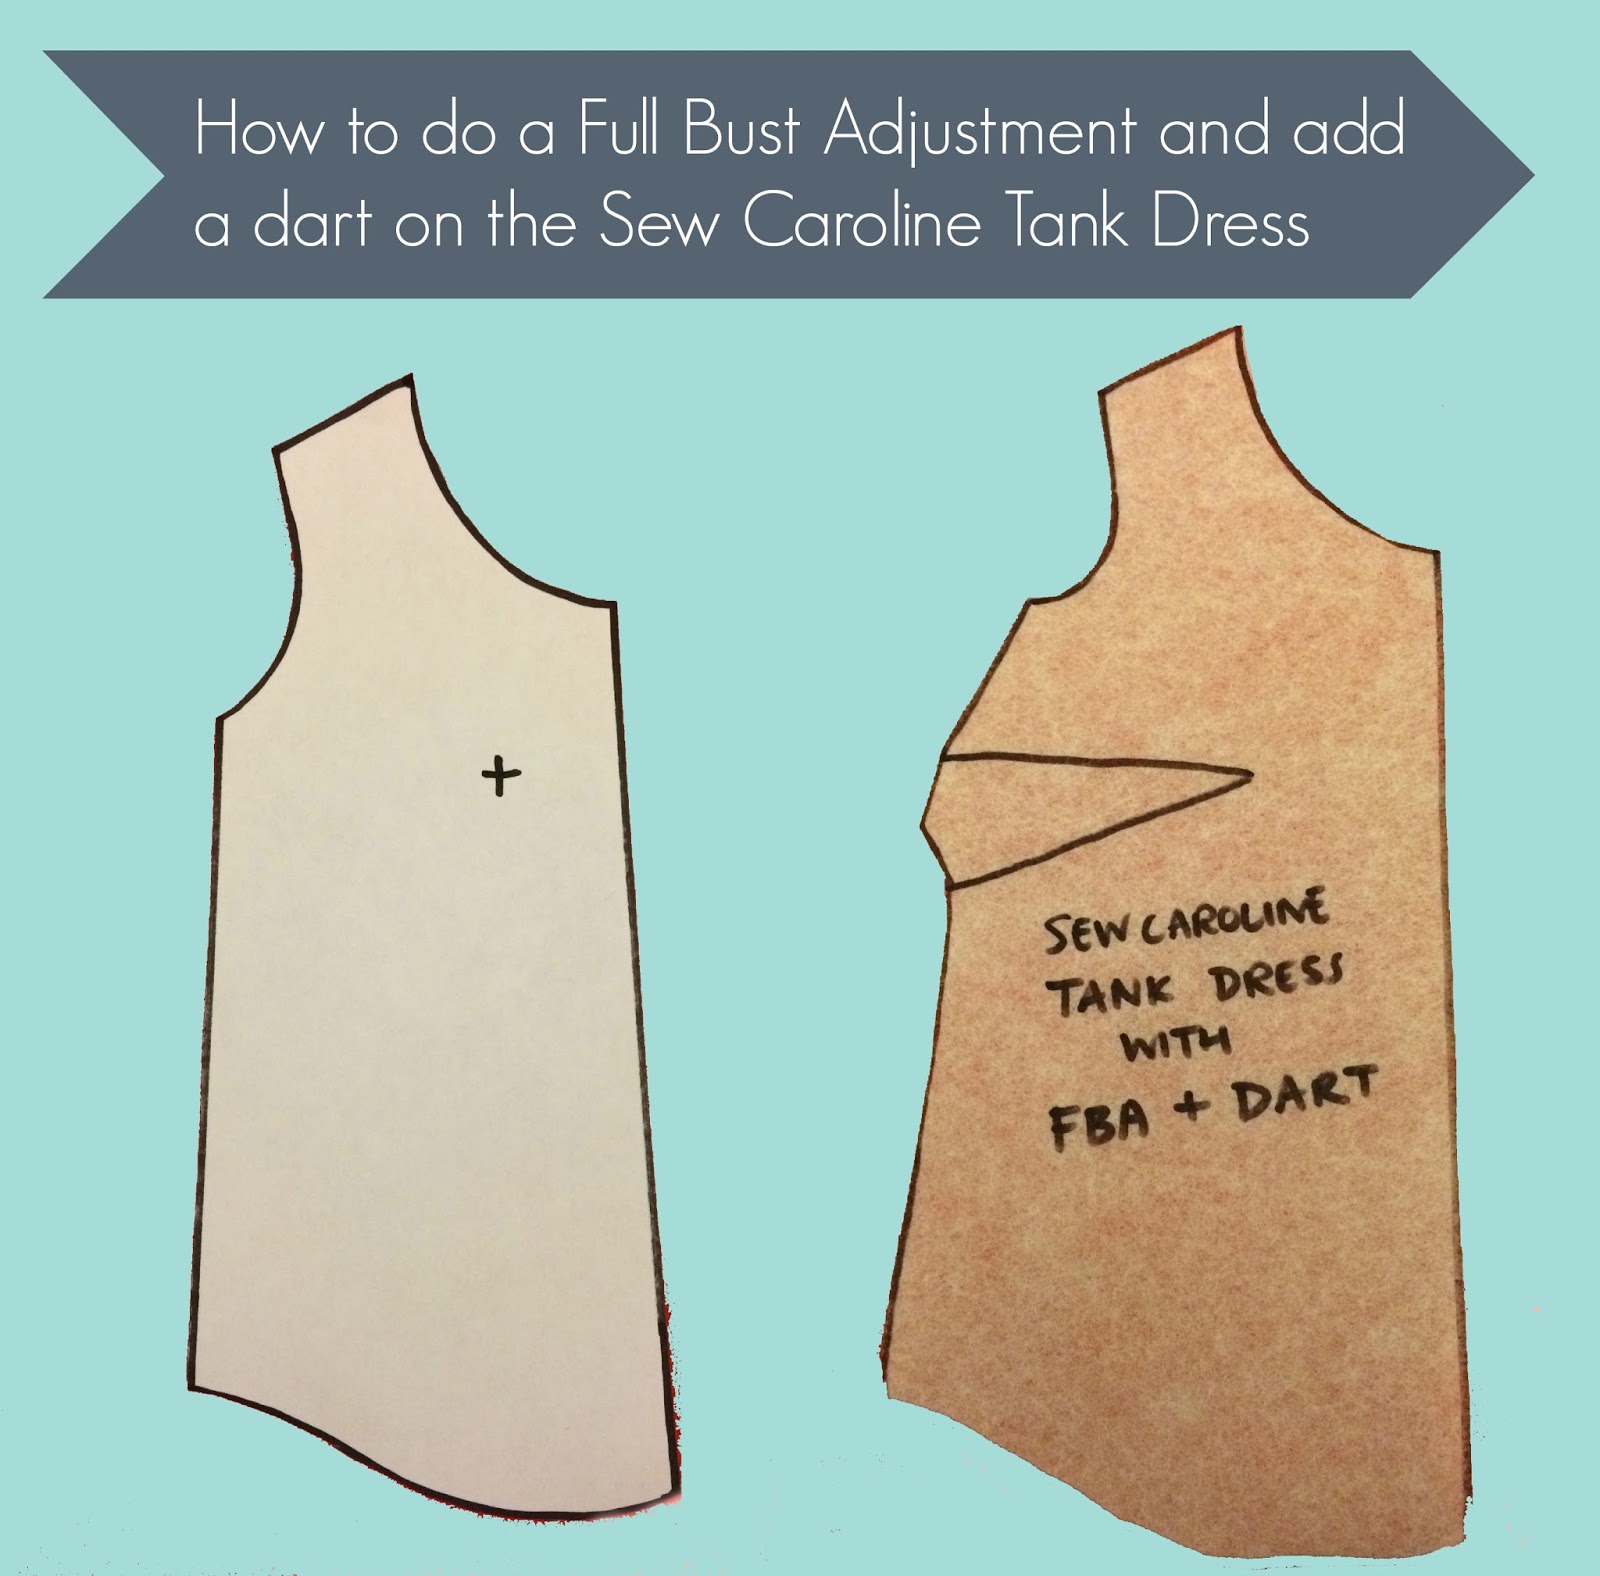
1. Calculate how much additional width you need through the bust.
The quickest way to do this is to measure your bust, and work out how much bigger it is than the pattern. Then, divide that by two (because you’ll be adjusting both sides!). An alternative way is to measure your high bust and use the pattern from that size, and then add the difference between your full bust and high bust.
2. Mark your apex on the pattern.
Yeah, your apex is your nipple (cue my Google searches going mental). Place the pattern against yourself, making sure the shoulder and side seams are in the right place, and mark it on the pattern.

3. Mark three lines coming out of the apex
The first one should go from the apex up to the armhole, about 1/3 of the way up. The second should go vertically straight down the pattern from the apex. And the third goes at a gentle angle toward the side seam (you can just judge the angle by eye).

4. Start cutting and spreading!
– Cut up the vertical line, angling at the apex to the line that goes to the armhole. However, make sure you stop just before the seam allowance (usually 5/8 inch in). Then make a little snip on the other side of the seam allowance, forming a hinge
– Then, cut the line from the side seam to the apex, and again stop just before the apex to form a little hinge
– Either pin or tape down the right hand side bit of the pattern
– Now “spread” the other pieces to the left, keeping the vertical pieces parallel. Separate the vertical pieces to the additional width that you need to add. As you do this, a dart will start forming magically at the side seam!

5. True up the length
You’ll notice that the pattern is no longer lined up at the bottom. To address this, make a horizontal cut in the right hand side piece (it doesn’t matter where), and slide that piece down so that the bottom is parallel again.

6. Trace that baby!
Put some tracing paper over the chopped up pattern and trace the new outline. The triangle at the side seam is your new dart. Depending on how much you added, you may also need to re-draw the armhole using a French curve to get it back to the right shape.

7. And here we are!
The adjusted piece. Sew up the dart before you sew up the rest of the dress, and the Tank Dress (or other non-darted pattern) will suit you oh so much better!

I hope this helps you!
This tutorial originally appeared at Cashmerette.

Hi, I just wanted to ask, If i have made a basic slopper pattern with measurements of my body, so i stil need to adjust the bust measurements?
Thanks for this. I’ve been mentally going over the steps to cutting down a thrifted oversized shir, and realized that there would be lots of extra fabric in the bust area. Then started wondering about an accurate way to figure a dart besides just pinching and pinning fabric. This will help a lot!
Hi Jenny, thanks for this tutorial. Just wanted to let you know I posted my experience FBAing the Scout tee and mentioned this tute. http://sewniptuck.com/2015/01/29/scout-tee-encounters/
Easiest tutorial ever! FBAs have always confused me before but this version looks easy. Thanks!
I can never have to much information on FBA’s. These instructions are very clear and easy to follow.
Great tutorial. It’s like you read my mind as I’m trying to put together the perfect T shirt dress for my figure, just the day before, and have done a similar adjustment. Next question came as i joined on the skirt pieces – how do you take out the additional width that is now added around the waist? I foolishly tried to ease the seams. The top looked a little too gathered though, then I went for two little pleats at the 1/4 points – a little too structured for a t shirt dress. Any idea on what to try next? I’m thinking maybe swing the dart down to the waist and take out the additional there?
Yes I think your final suggestion is a good idea. Or, and this isn’t really “proper” but you can just take extra off the waist sideseam..
I love this! I am very large busted, and alot smaller from under my bust down, have tried everything to adjust for darts and more room around the bust, but not underneath without it looking like a maternity top. These directions are perfect. This was an ahh ha moment for me. Best tutorial I have seen yet.
Thank you for this . I need as much information about FBA’s that I can get. Would you use this adjustment on a stretch dress or top?
Yes you can!
ok, opinions from busty sewer’s wanted (Sorry if this is the wrong place). I saw this really cute cord dress and I want one http://marillawalker.blogspot.co.uk/2014/10/winter-dresses.html . Then I realised that what I really want is to look like that and I won’t even in an identical dress in my size. Does anyone think it’s worth trying with an FBA? Marilla was super helpful and told me that her pattern has lots of ease so she didn’t think an FBA is needed and sent me a link to one of her testers http://justsewtherapeutic.wordpress.com/2014/10/20/marilla-walker-maya-dress/ – I really like the dark blue dress on that link, not so much the grey, but the dark blue one seems to be in the drapier material, ie. the least cord like.l
It depends on the look you want. This is meant to be a fairly loose fitting dress I think, and if your bust would fit into the finished pattern measurement for the bust size then go for it- but you are going to get a lot of “tenting” underneath. If you choose the size that links to your high bust measurement and do an FBA it should “scoop” a little more and be less tent-like. But at the end of the day an FBA won’t fundamentally change the shape of a loose top!
alteration I’m on the fence about this issue. And I’ve also done this many times.
Pro… great skill building, which should be the goal of all sewers. FBA is often done by curvy sewers even when using a pattern that DOES come in our size.
Con… This enables pattern makers to continue ignoring curvy sewers. (we know how to re-draft their too small pattern, so we buy it anyway) Which makes me even madder!
Thank you! I’m often stymied on what to do with this sort of garment. I adore my Grainline Studio’s Linden, but in working on my second, I wondered how to adjust it so that it was less big overall, more fitted in the bust and less tenty, when there was no shaping in the garment. Granted, it’s a knit pattern, but I’ve been thinking about trying it in a woven, and considering the sturdy knit’s I’ve been using, I imagine shaping would hold up decently. Hmm.
Thanks for the interesting (and thought provoking) post! TO THE SEWING ROOM!
Yep I think this could work! Also if you’re using a reasonably sturdy knit, you can put a dart in anyway and it should work
Thank you for this Jenny. It’s really a true “FBA tutorial for idiots” like me. 😉
Can I do this identical modification on the Colette Laurel? I’ve been wanting to sew a complete Colette Laurel dress for ages but I wanted/needed to do an FBA and put in some darts for the boobs because the original dress looks a bit frumpy. First I tried to make a short blouse to see how it looked on me, first I had problems with the back curvature so had to take that in, then I put in darts under the busts (like I’ve seen one girl do on her Laurel dress that turned out FABULOUS) but it didn’t look good. Even though I started out with a 1 size bigger toile in the end I got such a tight top that I cut barely pull it over my head. And I also discovered that I’d need to take in the sleeves a bit because they were to gaping. SO MUCH WORK for one dress. 🙁
I really don’t know how to make a proper FBA so if this tutorial is applicable then I’ll give the Laurel dress another try, but I’d still want darts under the bust, any ideas how to make those without making it look too horrible? 🙂
Hi! So the Laurel does seem to have darts already, so you could do an FBA but a traditional one using the darts. It’s actually exactly the same process as above, just when you draw the line to the sideseam you draw it through the middle of the dart.
Thanks. The Laurel does have one small dart from the armhole and halfway to the apex. But I really wanted to add another dart under the bust to give the dress more shape, like that girl did (some checkered blue and white dress, if I remember correctly, GORGEOUS) but my blouse turned out horrible.
So I thought I’d skip the waist dart and do a more thorough FBA, such as the one you made in you post above, maybe that’ll help.
I’ll try to decipher your instruction above when my cold gets better and my brain starts functioning properly again. 😉 Thanks again. 😀
To be honest, the way that the Laurel is formed isn’t really ideal for the busty if you want a fitted look! Have you looked at the new Tilly Francoise dress though? It has bust darts and French darts which gives more shaping
Wow, I am definitely buying that pattern, it’s lovely. Never heard of the dress before, thanks a lot for the tip. 😀
Great tutorial! Thanks, Jenny!
This is such a great tutorial Jen! Well done.